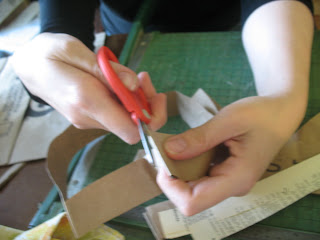
First, gather your materials:
- paper grocery bag
- cut-up-able dictionary page (or other contrasting paper)
- glue stick
- glue gun and glue
- selection of vintage buttons
- paper cutter (or ruler and scissors)

Now go ahead and cut your contrasting paper (in this case, some dictionary pages) into 1" strips.
Great. Now grab one of your strips of grocery bag and snip it on one of the folds, so you have a looooong strip instead of a loop.Get your gluestick and slather it on the the back of one of your contrast strips. Get the edges. And the ends. (If you're working, say, on your dining room table or some other surface you don't want fully stickified, it helps to put down a piece of parchment paper to act as a glue-catcher. Not that I'd know, or anything.)
Okay, now we're getting to the good stuff. Center your sticky contrast paper on your paper bag strip. (From here on out, we'll refer to your paper bag strip as a PBS because I'm too lazy to type it out anymore, 'kay?) Repeat this step until your entire PBS has been adorned with sticky contrast paper strips. (You guessed it: they'll be known as CPS from this moment forward. Way to keep up with me.) Burnish the paper with your fingernail or a giftcard to make sure you've got a nice seal.
Important question: Did you go to kindergarten? (If not, go find someone who did. I don't want you trying this next step on your own if you haven't got the necessary skill set.) Remember those fans you made in kindergarten, then, where you folded the paper back and forth to make a zig-zag? Reach back in your memory and hang on to that experience. We're going to do just that with our PBS/CPS combo. Ready? Fold.
Keep folding till you've got at least 12 peaks on your strip. Like this, see?
Now comes the fun part. Use your gluestick to adhere the first and last tabs together, like so:
(Sorry about the iffy picture quality there. I was holding the camera in my teeth.) Okay, we need to let that seal firm up for a few minutes, so this is a good time to take a coffee break, or check your email or something. But before you do that, plug in your glue gun and choose a pretty button to use for the center of your flower. We're that close.
All righty, then...you back? Good. Your tabs should be well and truly stuck together (that's a technical term, you know...) and your glue gun should be hot and ready to go. So here's the tricky bit. You need to transform your zig-zaggity circle into a flower. This is something of an origami move. Here's what it should look like to begin with:
Then like this...

And finally, like this:
Now squirt in another dollop of glue toward the top of your rosette. If you're using a button with a shank, stick it into the glue while it's still molten. If not, push the center together again and let it set up, then put a blob of glue on the back of your flat button and stick it on the center of the rosette. Easy-peasy, right? You're done!
Enjoy!
Not interested in making your own? Skipped Kindergarten and stymied by zig-zag folding? Have no fear---these guys will be in my shop on the morrow...


You're way too clever.
ReplyDeleteHow long do you hold it before the glue dries?
Oh, they're very effective. Like!
ReplyDeleteGrin - you had me at 'dictionary sacrifice'.
ReplyDeleteWendy, just read your tutorial on Handmadeology - congrats! It's a great read as well as a way cool project.
ReplyDelete- Rach
Any dictionary will be thrilled to become such nice rosettes. Congrats on all your features on the www, glad I found you {via Our creative spaces}
ReplyDeleteYou clever thing, you! Love these. They are so graphic and crisp :)
ReplyDeletecurrent treatment strategies for non-alcoholic
ReplyDeletefatty liver disease (nafld) current treatment strategies for non-alcoholic fatty
liver disease (nafld) current treatment strategies for
non-alcoholic fatty liver disease (nafld)
my blog post ... fatty liver and natural remedies